This guide walks you through setting up the 1Password for your NCEdCloud account
1. This document assumes that you have already installed and configured the 1Password browser extension -and- saved your NCEdCloud username and password in your vault. If you have not already configured 1Password, please refer to the official documentation, or contact your school’s IT team for assistance.
2. Attempt to log in to NCEdCloud as usual. If you have not previously configured MFA or if it has been reset by an administrator, you will see a QR code alongside a request to configure MFA.
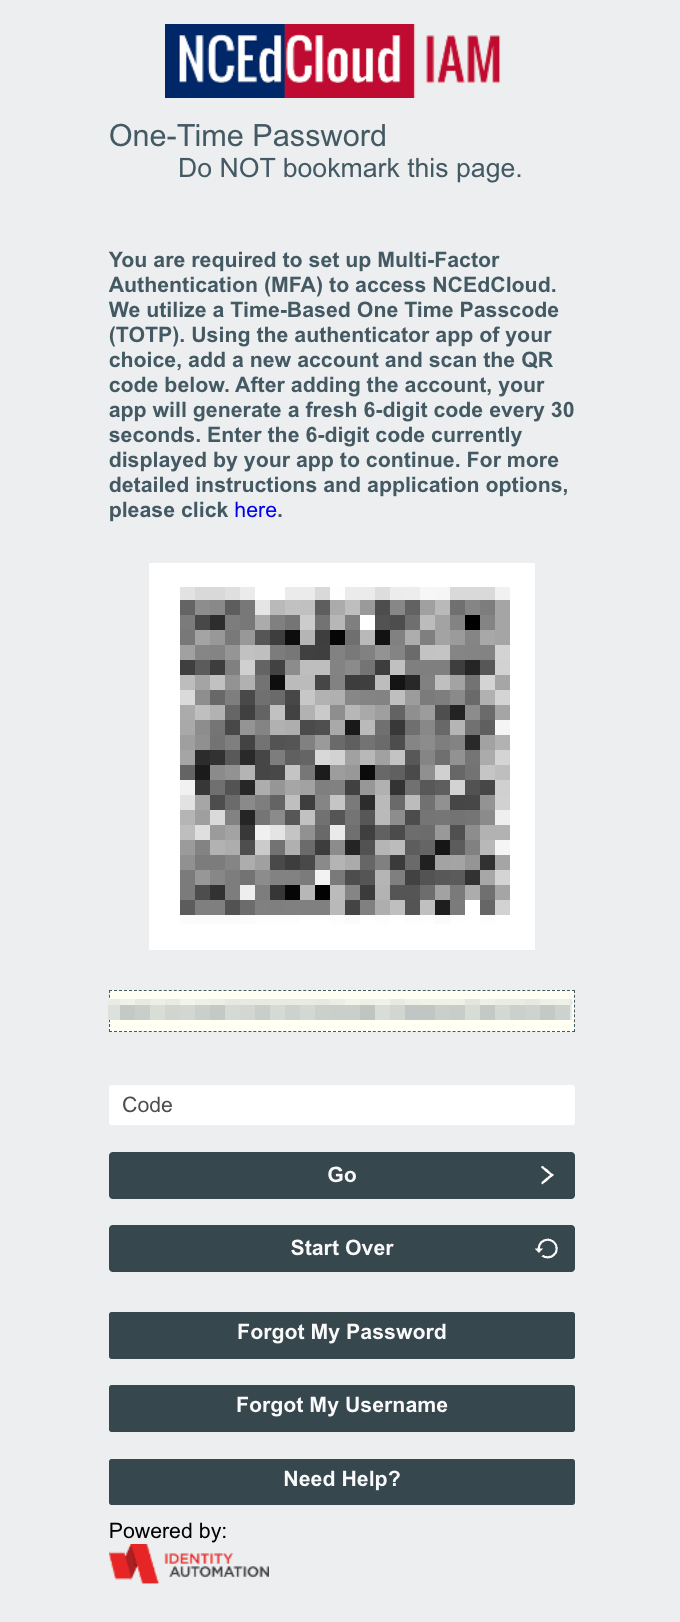
Don't see a QR code? Contact your district's IT team to request a TOTP reset.
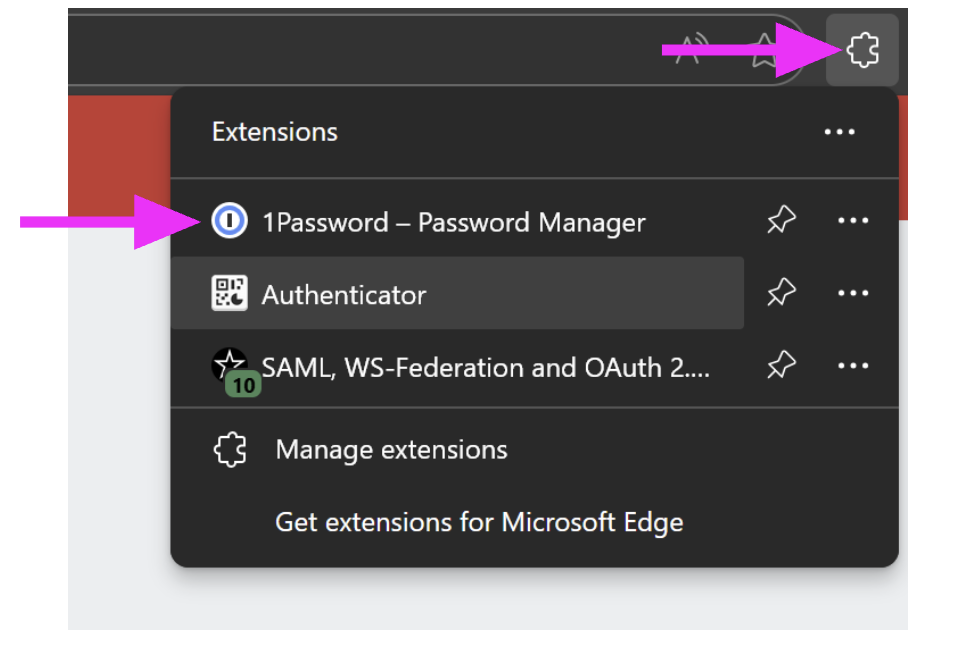
3. In your browser’s toolbar toward the top right, click to open the 1Password extension. You may need to click the puzzle piece icon to view installed extensions, then select 1Password.
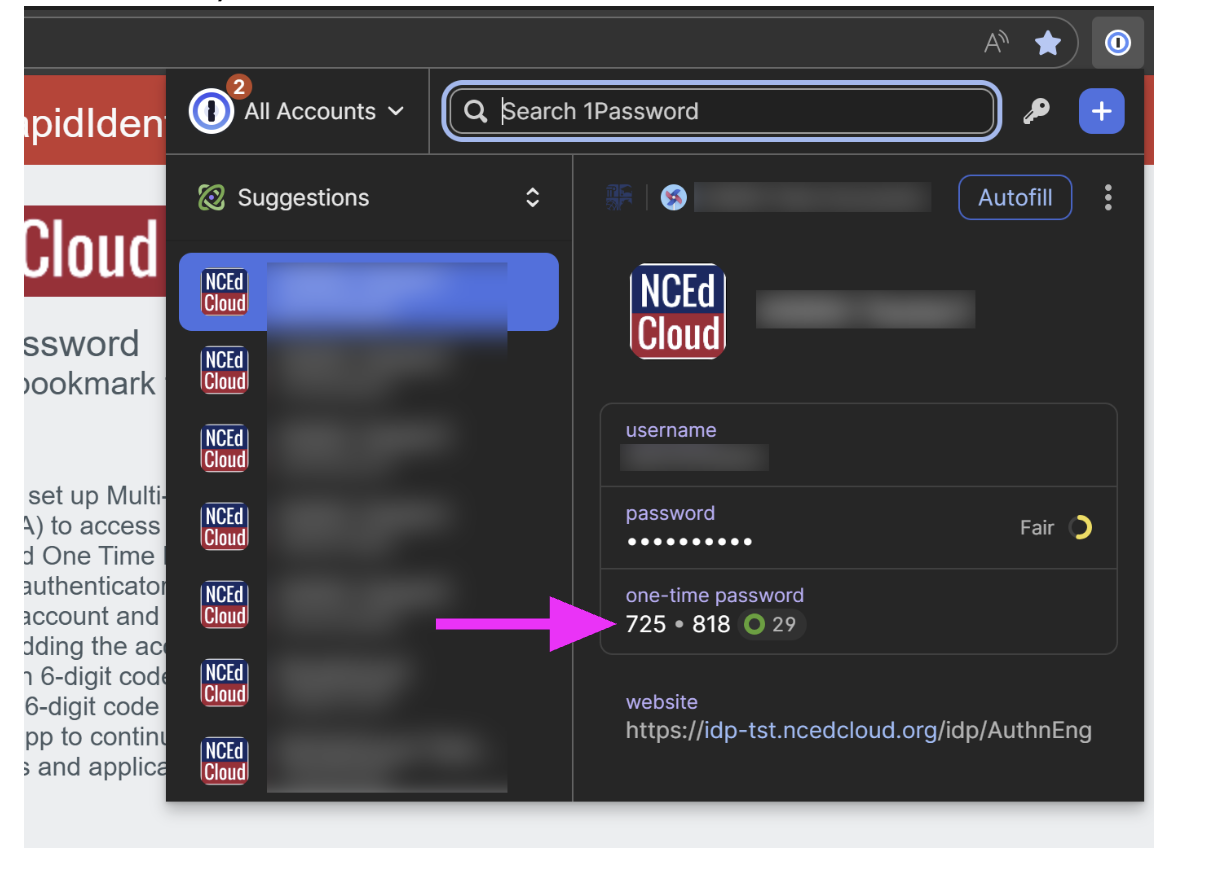
4. On the left side of the 1Password panel, ensure your NCEdCloud account is selected. If it is not, click to select the correct account. Then, click the three dots at the top right and select “Scan QR Code” from the menu.

5. If successful, a new “one-time password” item will be added. 1Password will display a 6-digit numeric code associated with your NCEdCloud account. It will generate a new code every 30 seconds.
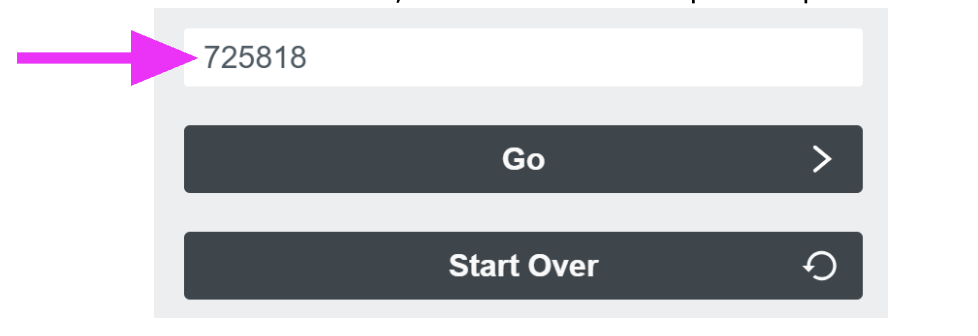
6. Enter the code currently displayed by 1Password into the bottom-most box on the NCEdCloud screen, then click “Go.” Setup is complete!
7. Each time you sign in to NCEdCloud, you will be asked to enter the code currently displayed by 1Password after entering your username and password. Keep in mind that you must always retrieve the current code from 1Password. Do not write down or save previously used codes. This keeps your account secure even if your username and password are compromised.